Things Get Built - Wyrd Insidious Madness
A few months ago, I noticed on the Wyrd forums there was a post about people having trouble putting together the Insidious Madness, specifically how the arms were a bit confusing in terms of where they fit. I had two of these for a Malifaux tournament that I was getting ready for,and at first glance, I thought it looked like something that would be pretty fun to put together (even if it was a bit of a challenge). How wrong I was...
I did a dry fit, and one of the problems seemed to be holding the arms all in place at once. With a bit of positioning, I started to figure out how it goes together, and thought I should take some photos as I go and do a write up. I did however manage to not get the final photo of the model built but it should be straight forward from that point.
First of all, what you need for the quick fit to make things easier, are these things:

Superglue is essential, unless you have some kind of super-superglue. I also used some superglue accelerator in order to speed up the drying time, and a Dremel with an engraving tool plugged in. I didn't pin the arms on, but I did widen the holes that the arms went in so that I could fit them in a bit easier.
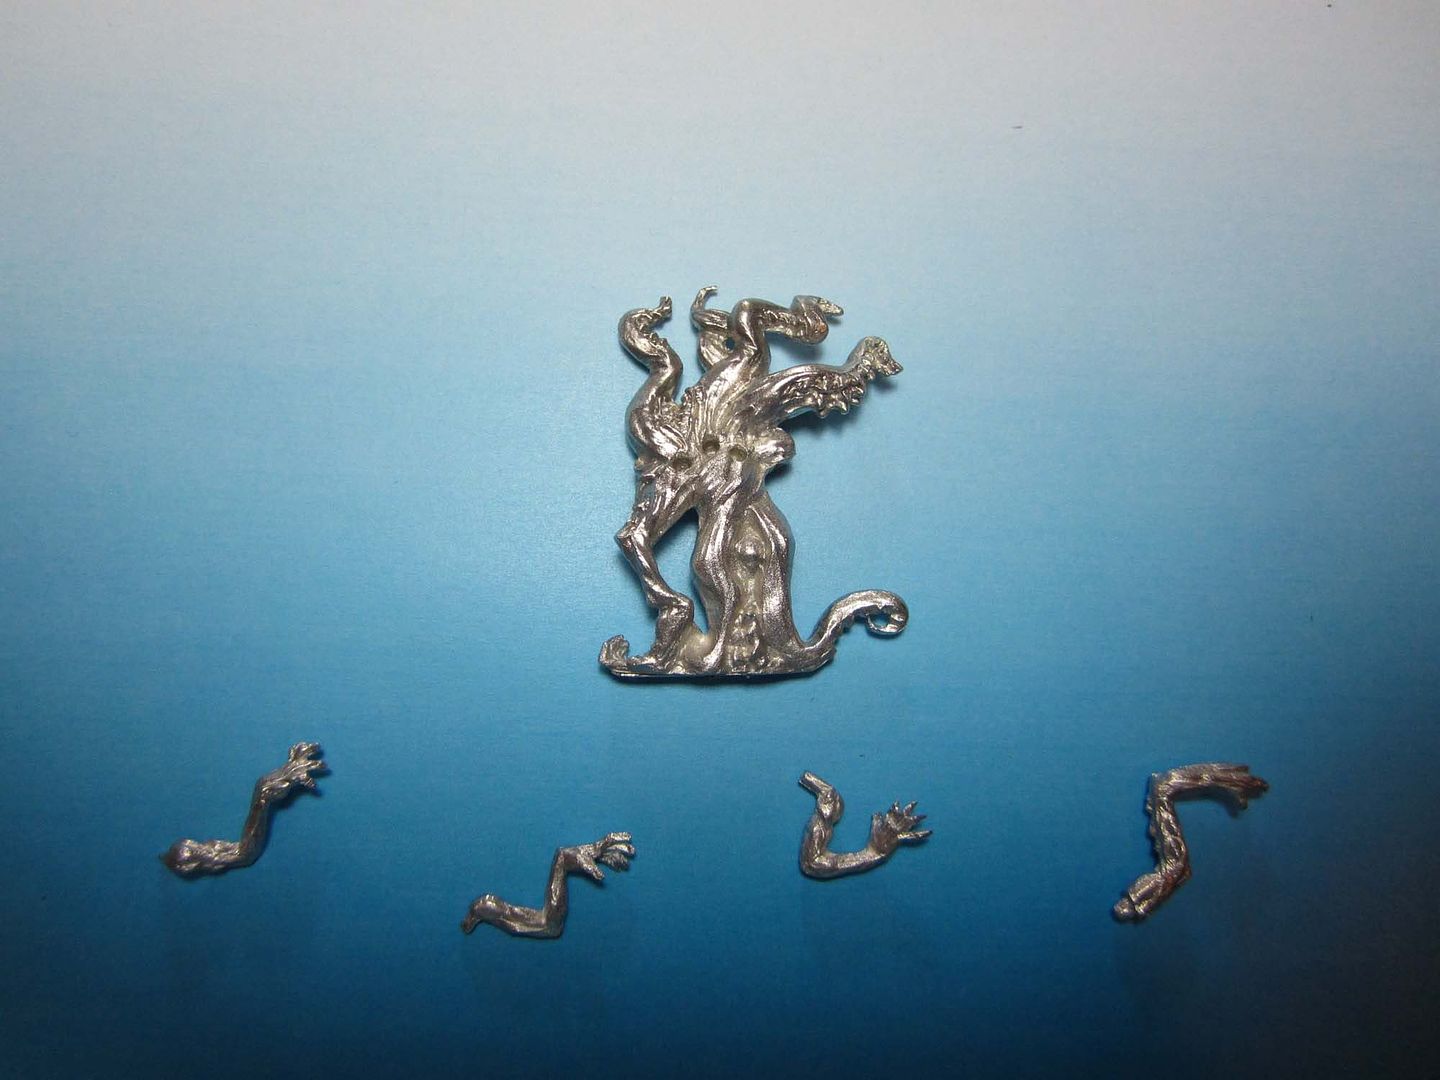
So this is the angle I was working on the model from, and also how I laid the pieces out. You'll notice that of the three arms, only one is a left arm, and that is the one that goes in the centre hole. The arm on the left hand side is the one of the two remaining stretched out more. The far right is the tentacle arm, but that should be pretty obvious from the get go. From what I could see from the dry runs, the arms fit on best when you work from the far right to the far left, one at a time.
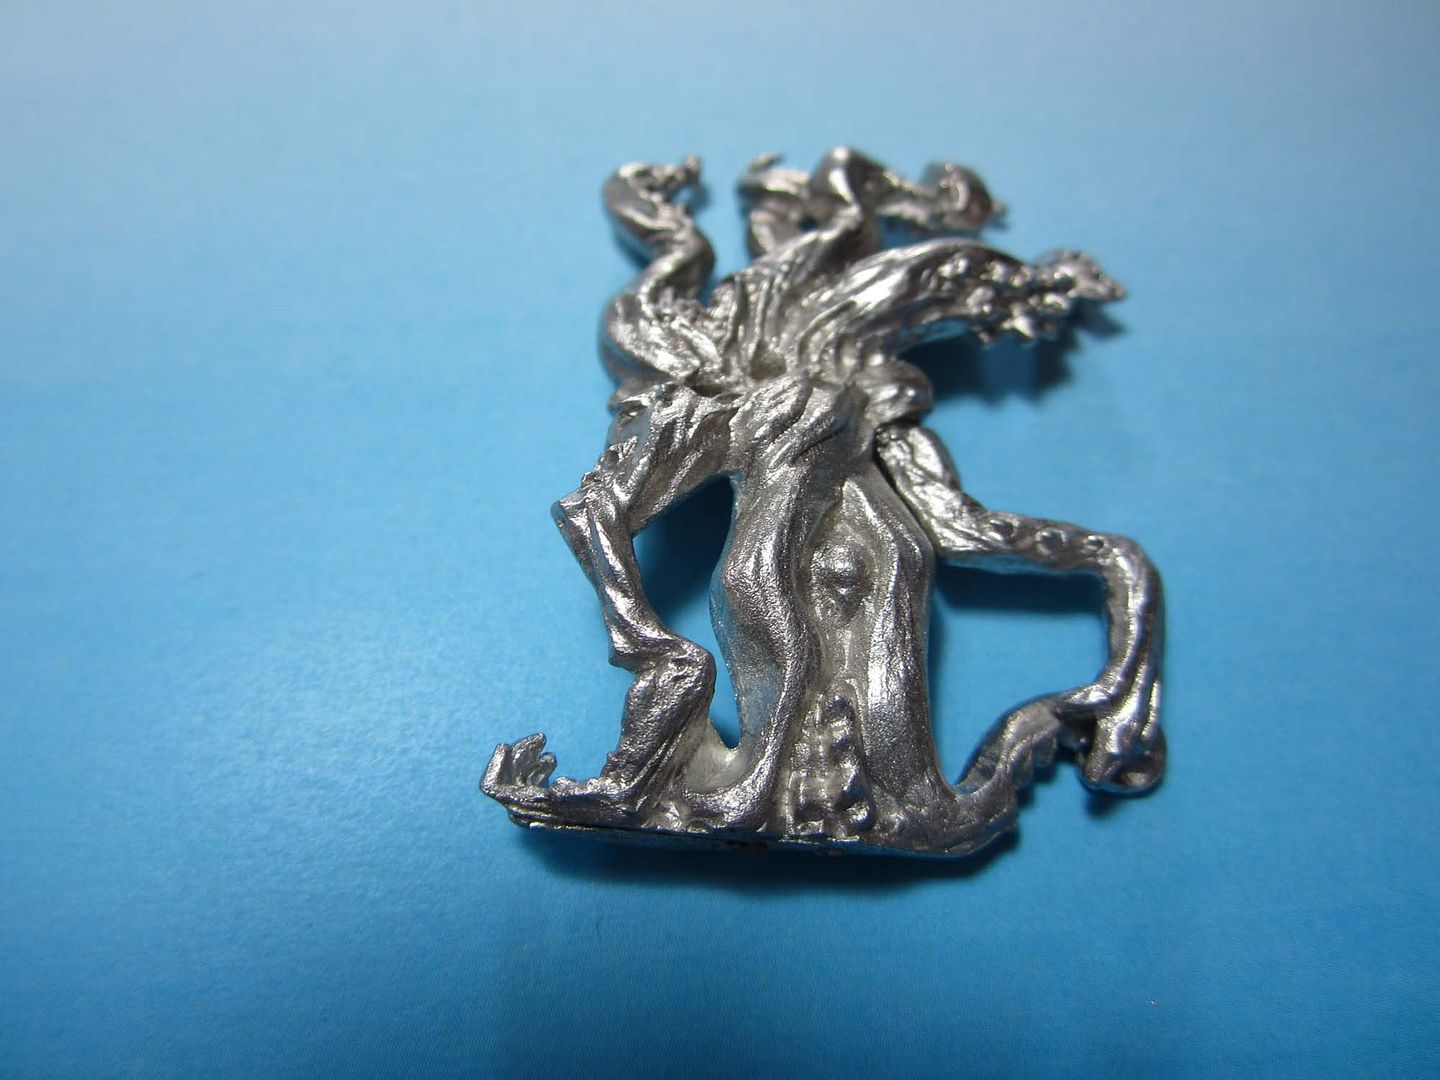
The tentacle arm goes on first. The hole it plugs into doesn't fit it perfectly, however this was a quick fit together, and I had decided before starting that there were going to be a lot of gaps that I would end up filling gaps, so this gap was something I decided I would come back to later. Then I started to work on the arms:
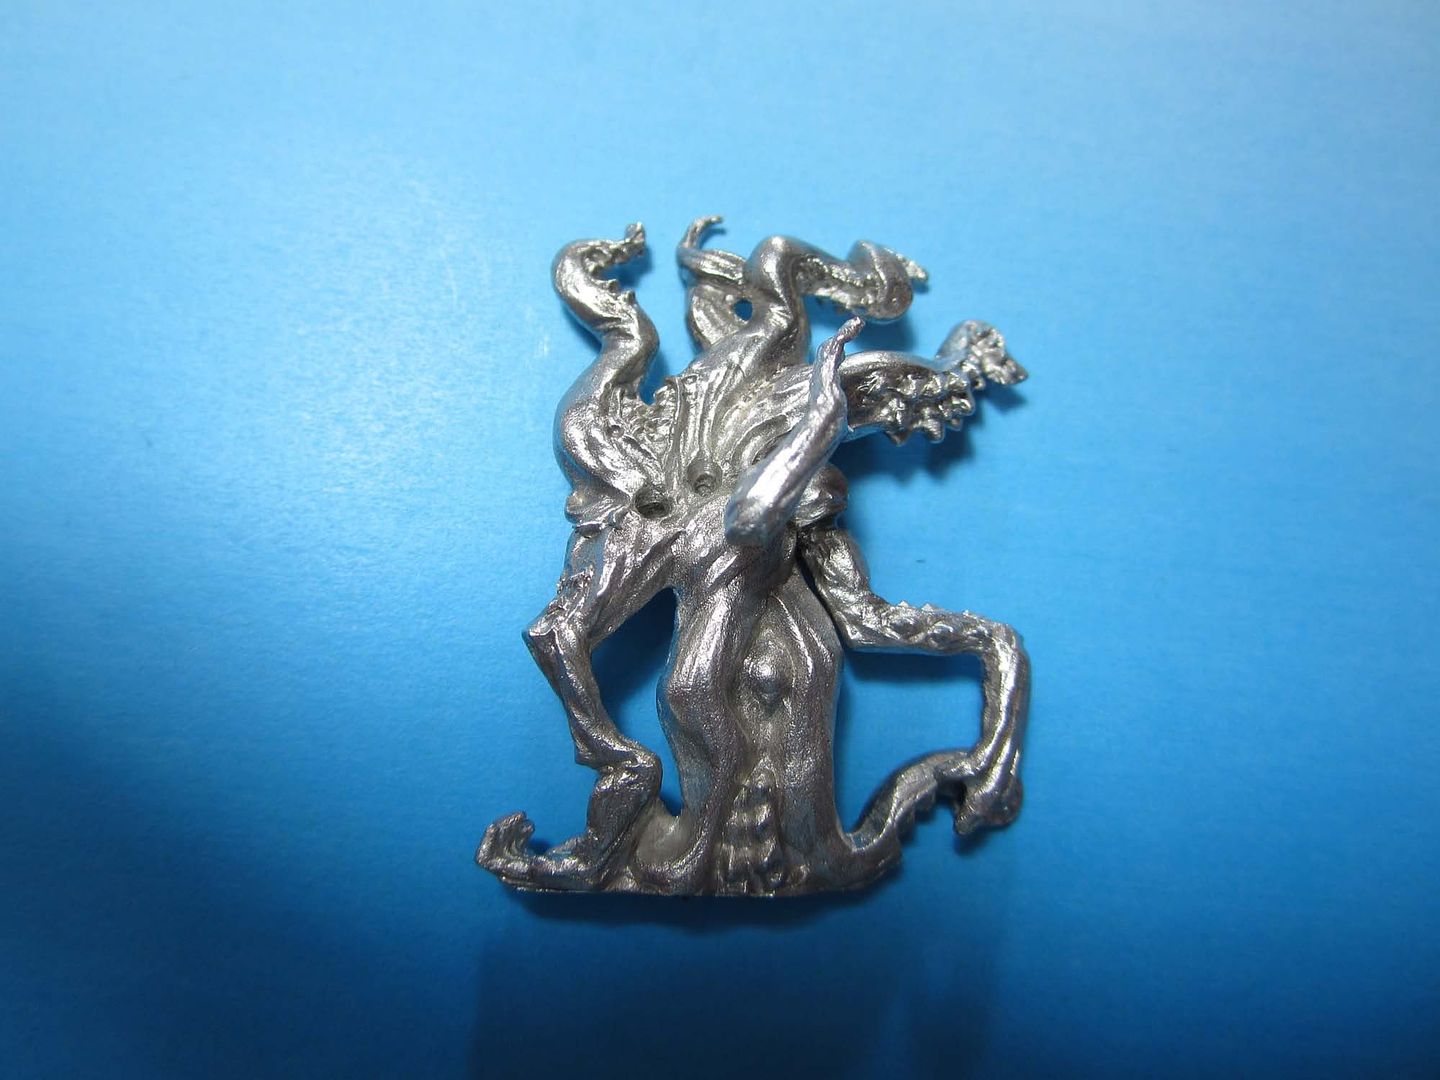
This is the first arm on (Working from right to left the way I had the arms laid down earlier). The angle of the first arm seems to decided the other angles of the arms behind it. Because they are packed so closely, they appear to rotate into the previously placed ones to find the position:
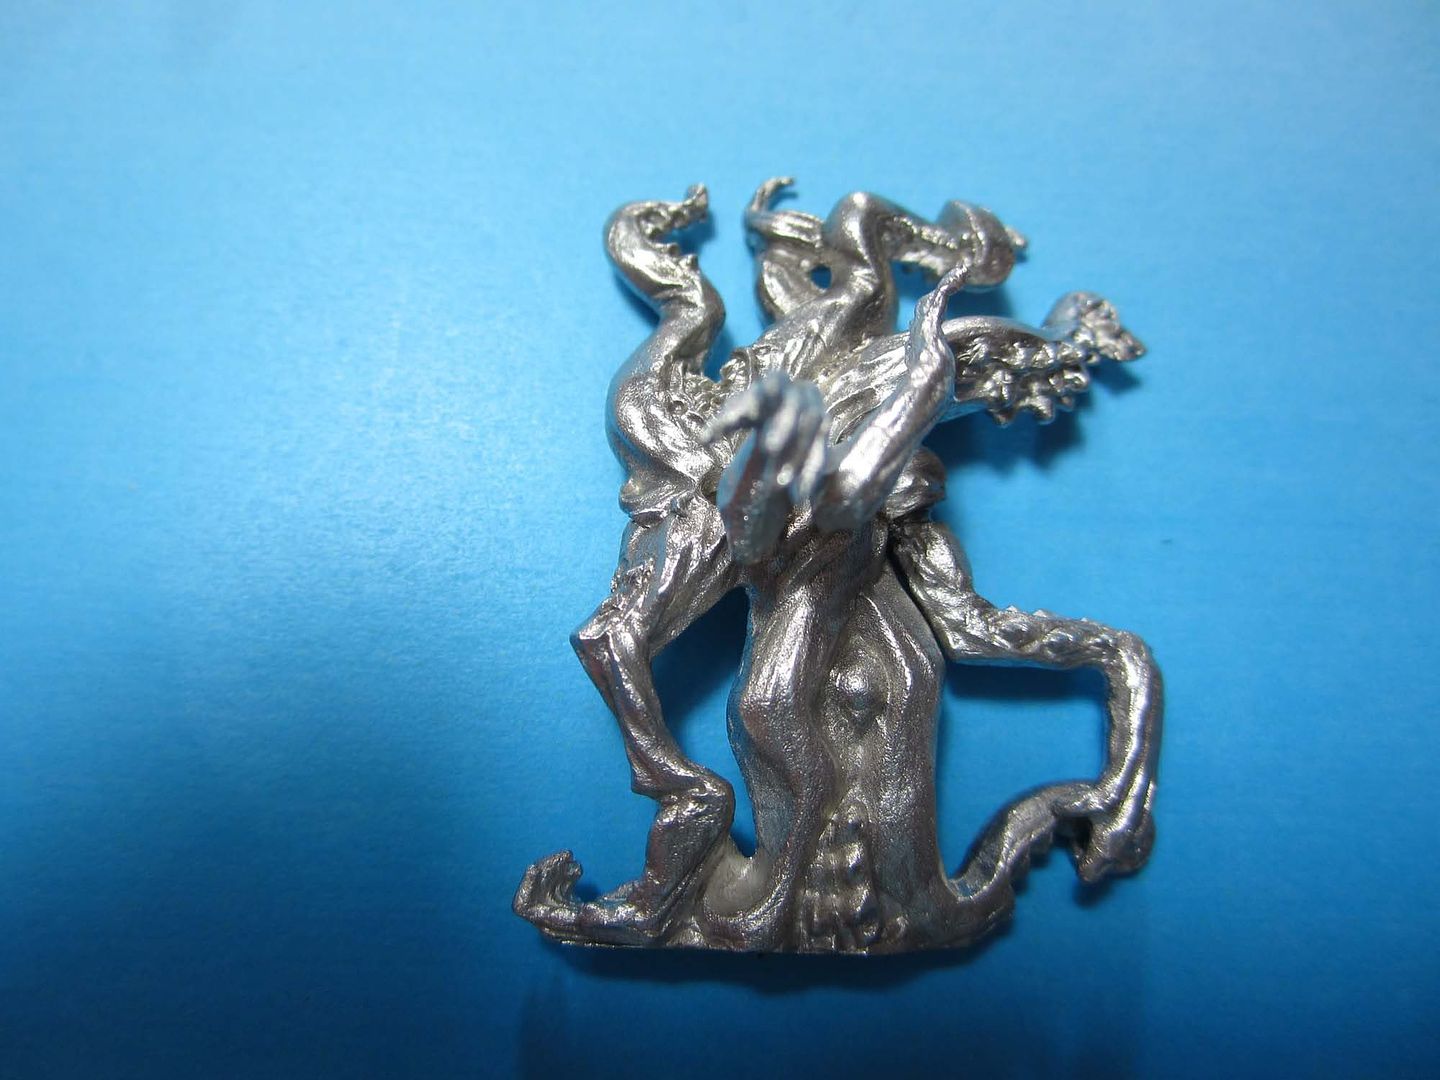
This is the second arm in place. When clipped in, I found it easier to slot it in at the wrong angle, then rotate it around to rest against the other arm in the correct position. Once in, it sits fairly solidly. The third arm went in next, but I stupidly didn't get a photo of it at the time.
The only thing beyond this I did was to fill in the larger gaps with a mix of milliput and greenstuff, and the smaller gaps around the arms which I used watered down liquid greenstuff with, and essentially washed it into the gaps to fill them in.
I did a dry fit, and one of the problems seemed to be holding the arms all in place at once. With a bit of positioning, I started to figure out how it goes together, and thought I should take some photos as I go and do a write up. I did however manage to not get the final photo of the model built but it should be straight forward from that point.
First of all, what you need for the quick fit to make things easier, are these things:
Superglue is essential, unless you have some kind of super-superglue. I also used some superglue accelerator in order to speed up the drying time, and a Dremel with an engraving tool plugged in. I didn't pin the arms on, but I did widen the holes that the arms went in so that I could fit them in a bit easier.
So this is the angle I was working on the model from, and also how I laid the pieces out. You'll notice that of the three arms, only one is a left arm, and that is the one that goes in the centre hole. The arm on the left hand side is the one of the two remaining stretched out more. The far right is the tentacle arm, but that should be pretty obvious from the get go. From what I could see from the dry runs, the arms fit on best when you work from the far right to the far left, one at a time.
The tentacle arm goes on first. The hole it plugs into doesn't fit it perfectly, however this was a quick fit together, and I had decided before starting that there were going to be a lot of gaps that I would end up filling gaps, so this gap was something I decided I would come back to later. Then I started to work on the arms:
This is the first arm on (Working from right to left the way I had the arms laid down earlier). The angle of the first arm seems to decided the other angles of the arms behind it. Because they are packed so closely, they appear to rotate into the previously placed ones to find the position:
This is the second arm in place. When clipped in, I found it easier to slot it in at the wrong angle, then rotate it around to rest against the other arm in the correct position. Once in, it sits fairly solidly. The third arm went in next, but I stupidly didn't get a photo of it at the time.
The only thing beyond this I did was to fill in the larger gaps with a mix of milliput and greenstuff, and the smaller gaps around the arms which I used watered down liquid greenstuff with, and essentially washed it into the gaps to fill them in.


Comments
Post a Comment